11.11.2025
What is Rear Lens Filter
Definitions
The conventional placement for a camera filter is at the front element of a lens. However, a less common yet increasingly relevant option, especially in the era of digital cameras, is the rear lens filter. These internal filters generally fall into two categories: attached systems and drop-in systems.
The attached system involves a small, lightweight filter directly secured to the rear housing of the lens itself. This is most commonly achieved using a magnetic mechanism, allowing the camera assistant to quickly snap the filter on or off. Magnetic systems are typically designed to work seamlessly with specific lens sets, ensuring precise alignment and minimizing any risk of light leaks or mechanical interference.

DZOFILM KOOP magmatic attach rear filter
A drop-in filter system is inserted into a dedicated adapter or cavity positioned within the camera body's lens mount or a specialized mount adapter. This design leverages the extra space that often exists between the rear element of the lens and the camera's sensor. This gap is especially pronounced in cinema lenses originally designed for longer flange distance mounts (like PL or Canon EF), now adapted to cameras with much shorter flange distances. This engineered space provides a safe location for the insertion of a compact, internal filter, which is secured by a locking mechanism within the adapter.
CATTA COIN Drop-in Rear Filter
Type of Rear Filters
Rear filters offer filmmakers the same variety and optical quality as their front-mounted counterparts, with the added benefit of being housed internally. The types of filters available as rear inserts are extensive, for example:
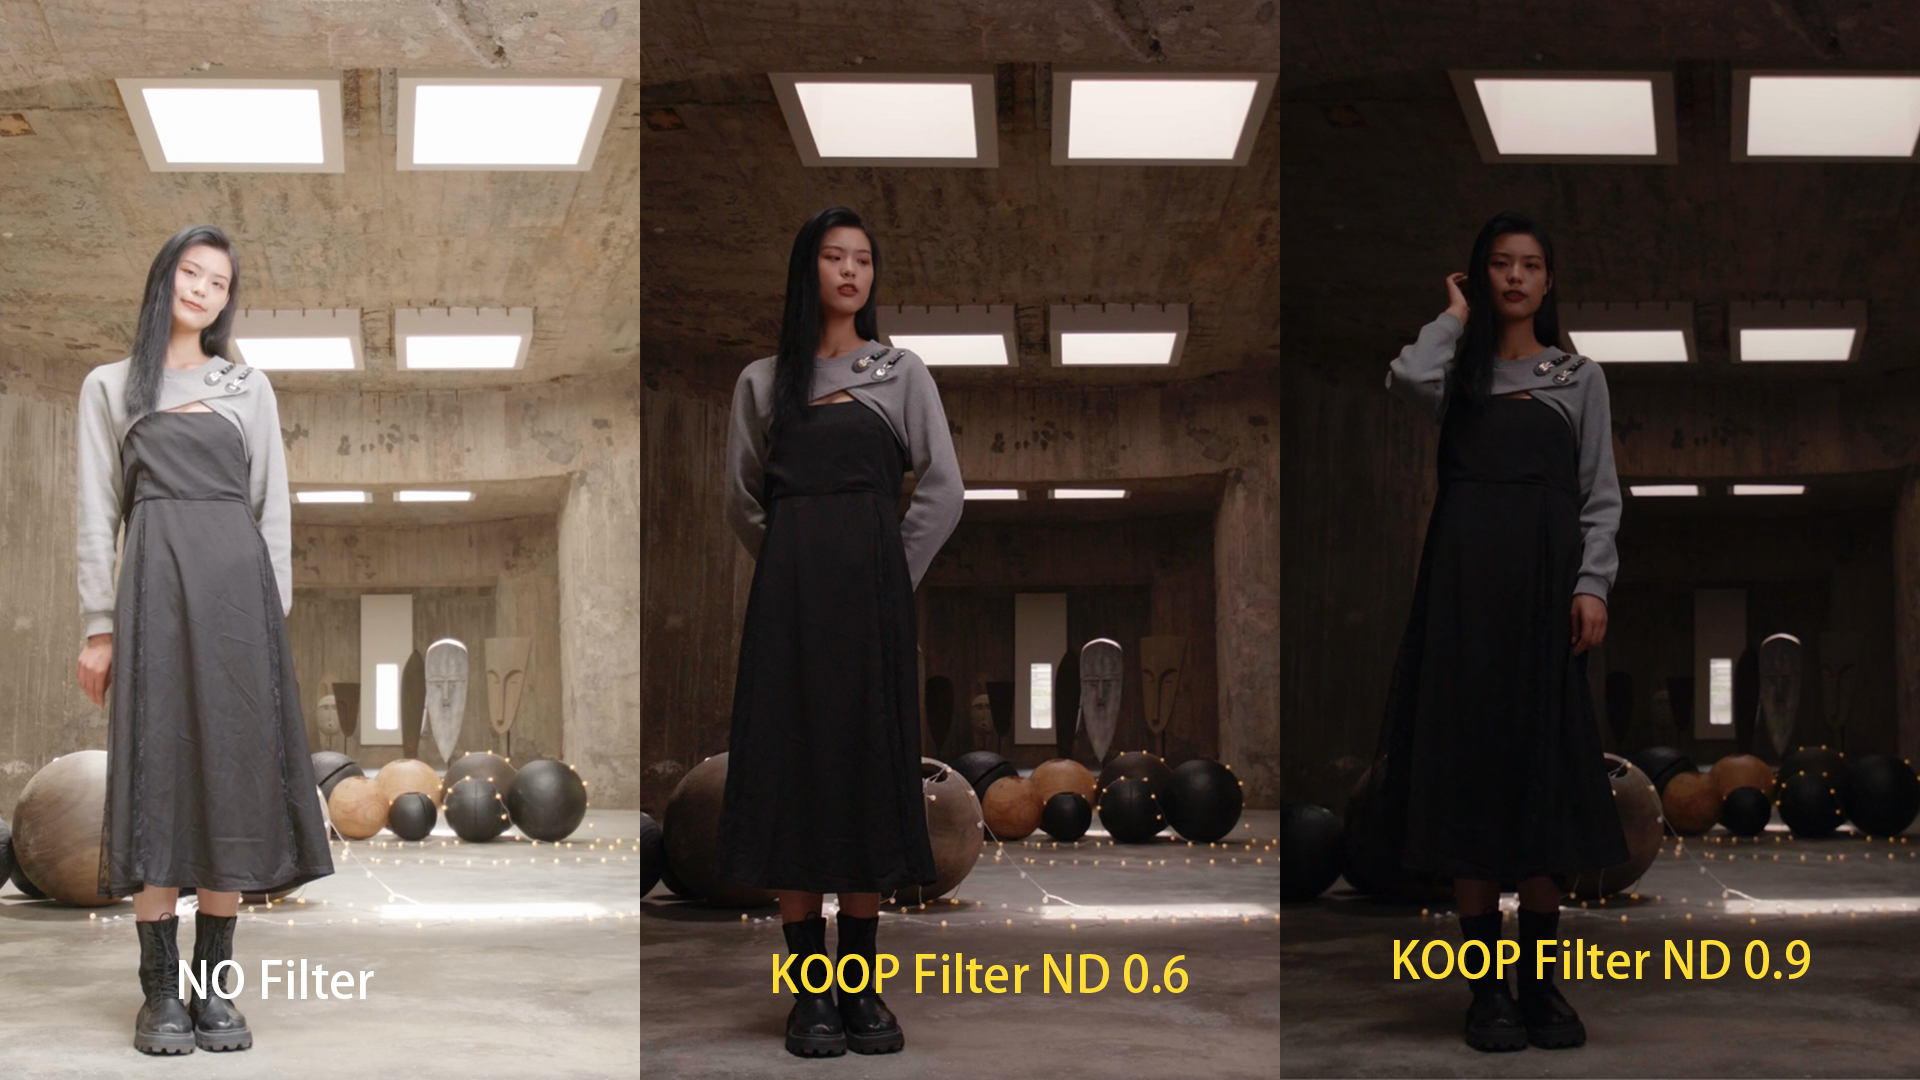
Neutral Density (ND) Filters: Used to precisely control light transmission, allowing for wider apertures even in bright conditions.
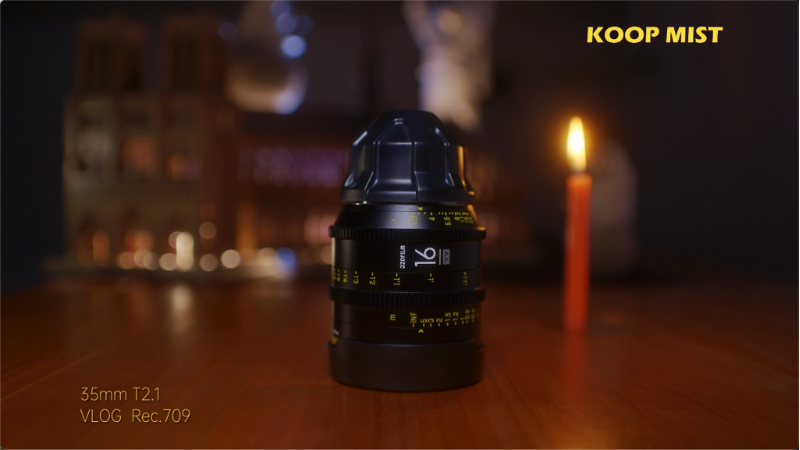
Diffusion Filters (e.g., Black Mist/Pro-Mist): Used to subtly soften highlights, reduce contrast, and create a filmic glow.
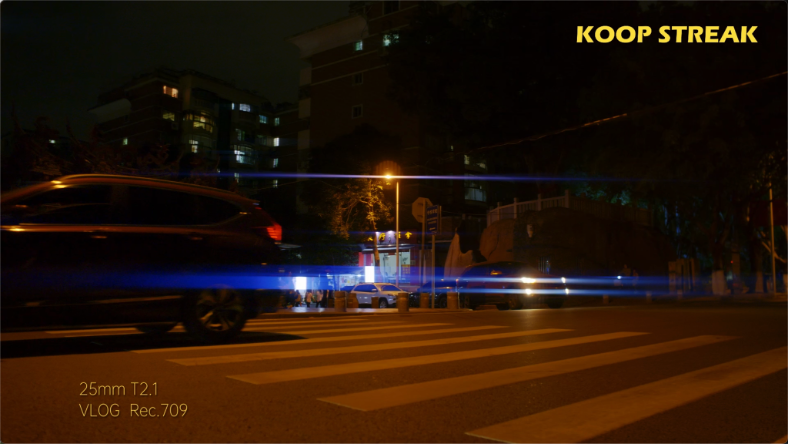
Special Effects Filters (e.g., Streak Filters): Used to simulate anamorphic lens flares by creating horizontal or vertical light streaks.
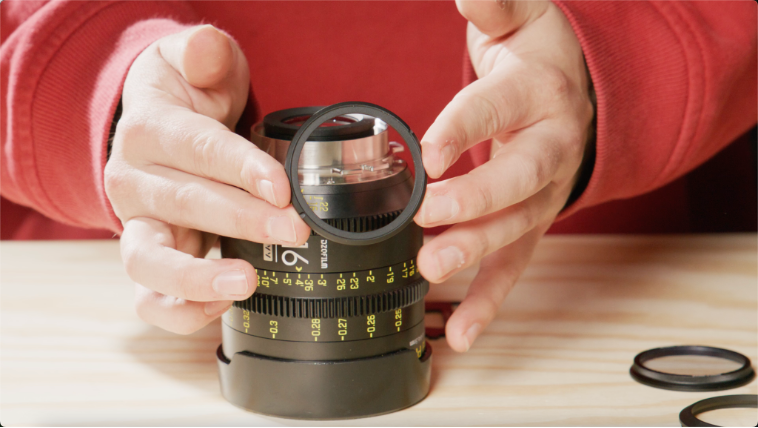
Beyond simply replicating front filters, the rear placement enables unique optical effects that are difficult or impossible to achieve externally. For example, custom Bokeh Filters. A standout application is the DIY or custom bokeh filter. This involves placing a precisely cut mask (often a stencil or shape) near the diaphragm or rear element. Because this mask is positioned deep within the optical path, it dictates the shape of out-of-focus light sources (the bokeh). The custom bokeh filter, by its nature of blocking portions of the light path, will reduce the effective light transmission of the lens. This results in a lower T-stop value compared to the lens's marked f-stops.

Effect of Koop DIY Bokeh Filter
Advantage of rear lens filter
Better Optical Performance
Traditional front filters are positioned at the front of the optical assembly. When a bright light source strikes the front of the filter, the distance between the filter's surface and the lens's front element creates an opportunity for internal reflections, resulting in unwanted flare and ghosting. These phenomena manifest as additional lens flare across the frame.
By contrast, rear filters are nestled deep inside the lens barrel. This proximity to the rear element and the light-trapping environment of the barrel significantly reduces the angle at which stray light can hit the filter's surface, effectively eliminate reflections and preserving the lens's native contrast.

Difference in flare between Front ND filter and Koop ND 0.3 filter
Low-quality or improperly coated filters, regardless of placement, can introduce significant imaging issues, but the negative effects are generally more pronounced with large front filters.
Economic Efficiency and Scale Reduction
The shift to rear filters offers a tangible price advantage rooted in the physics of scale and material science. In professional cinema, filters are often large, rectangular plates used in a matte box (typically 4" x 5.65" or even 6.6" x 6.6"). The price of a filter increases disproportionately to its size, primarily because of the difficulty and cost of manufacturing a large, perfectly flat, and uniform piece of optical-grade glass.
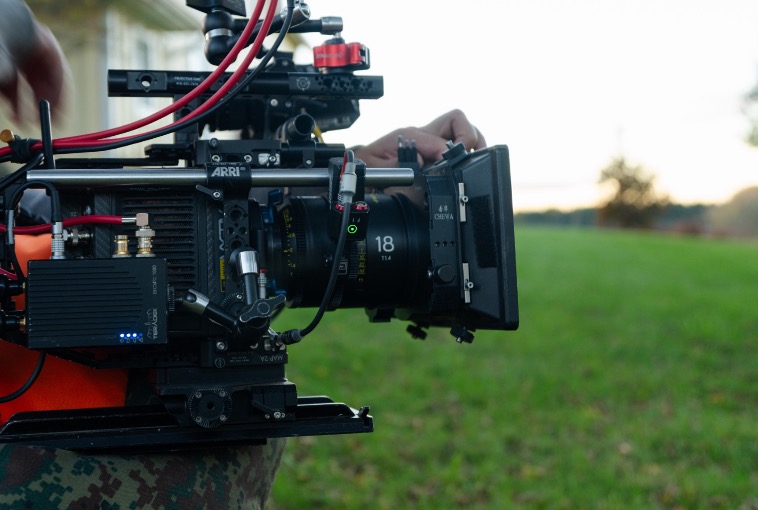
Front filter system with a matte box on Arles 18mm T1.4
Because large front filters require substantial surface area of optical-grade glass, manufacturing them without defects is inherently more difficult and expensive. Consequently, cheap large front filters are more likely to exhibit typical flaws stemming from inferior materials. Specifically, low-cost substandard filters can cause selective light absorption. This leads directly to color temperature deviation or a noticeable color shift across the image.
Significantly Smaller Koop Rear Filters
Rear filters are significantly smaller, often only 30mm to 50mm in diameter. The reduction in the required raw material and the ease of manufacturing small optical components translate directly into a substantially lower production cost. This allows for a much larger and more diverse arsenal of filters can be manufactured with less expense using glass of a higher optical quality.
Operational Versatility and Efficiency
Beyond performance and price, rear filters excel in operational versatility and efficiency, particularly when working in dynamic, fast-paced shooting environments.
In a professional cinema setup, changing a square filter in a matte box requires a multi-step process: unlatching the filter stage and carefully sliding the large, heavy filter out. Furthermore, camera assistants often need to completely remove the matte box when swapping prime lenses. These cumbersome processes are time-consuming.
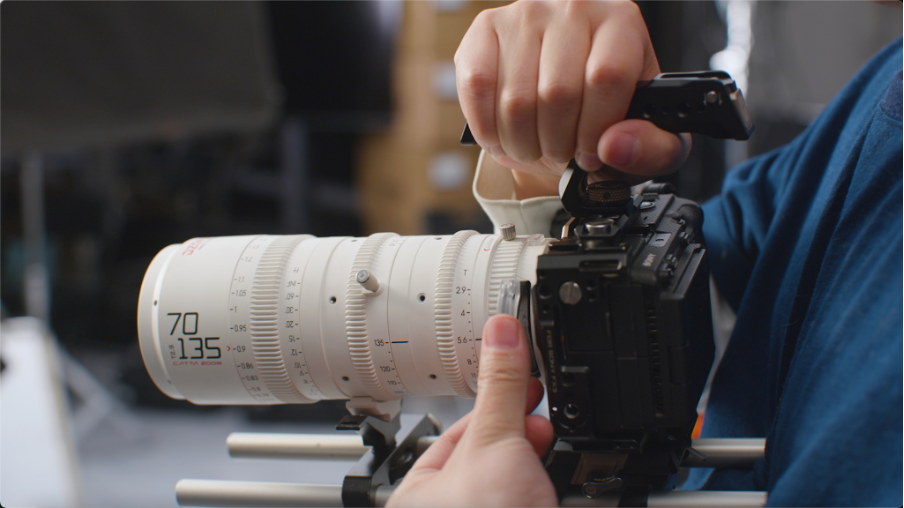
Catta Zoom with rear filter made the filming equipment more compact
Rear filters, on the other hand, employ a simple drop-in mechanism or magnetically attach to the lens rear. They can be swapped out in seconds with minimal contact, dramatically reducing the downtime between takes. This speed and ease of adjustment make them ideal for subtle exposure corrections (like quickly swapping an ND value) or for use on camera rigs where a large matte box is impractical, such as gimbals, drones, or lightweight handheld setups. This superior adaptability ensures faster, more efficient workflows for filmmakers.
Disadvantage of rear lens filters
The flexibility offered by rear filter systems comes with a significant caveat: they are highly specific. Not all lenses are compatible with either drop-in or magnetically attached rear filter systems, as the design must account for the lens's physical and optical properties.
The Challenge of Compatibility
Manufacturers often design rear filter systems to be system-specific, meaning they are engineered exclusively for certain lens lines. This precision is necessary to ensure the filter sits at the optimal—and safe—distance from the lens's rear element and the camera's sensor plane.
Attached Systems: Filters that attach magnetically, such as the DZOFILM Koop filters for their Arles Primes, Catta Ace, and Vespid Primes lenses, or the ARRI Impression filters for their Signature Primes, rely on precise mounting tolerances. These systems are designed as part of a proprietary lens ecosystem, ensuring the optical path and mechanics are perfectly aligned. Even in these systems, lenses that use rear filters often require an adjustment to the lens's back focus.
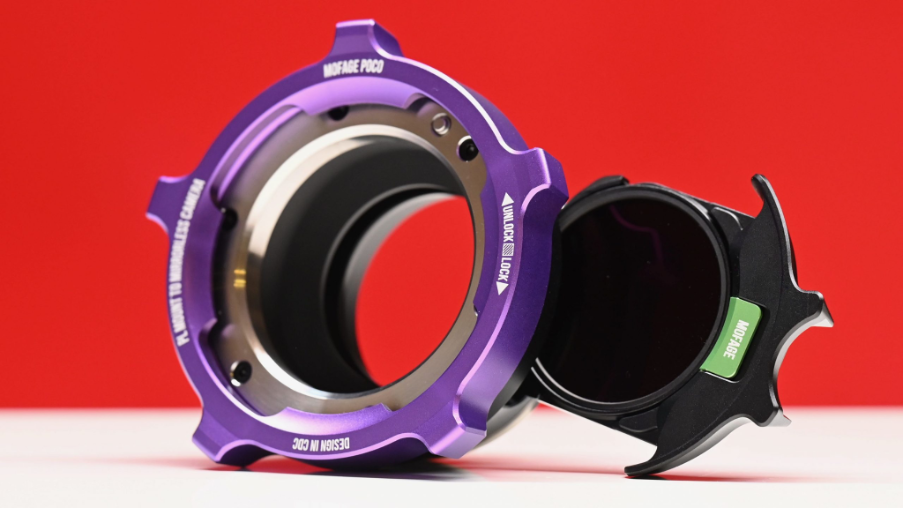
A Poco PL to Mirrorless Camera Drop-in Rear Filter Adapter
Drop-in Systems: These filters are installed into an adapter or a dedicated space between the lens mount and the sensor. However, this method is immediately thwarted by lenses featuring an Protruding floating rear lens group —a design where the final glass piece protrudes significantly toward the camera when focusing. In such cases, the lens element would physically damage both the lens and the filter itself.